Overview
Provalytics can be connected to ChatGPT through a custom MCP connector in supported ChatGPT workspaces. Once connected, ChatGPT can work directly with live Provalytics data so teams can ask questions, inspect performance, and prepare answers without exporting files first.What you need
Before starting, confirm you have:- a
ChatGPT Business,ChatGPT Enterprise, orChatGPT Eduworkspace - admin access to that ChatGPT workspace
- access to the
MCP Server Accesspage in Provalytics - a user-specific Provalytics API key
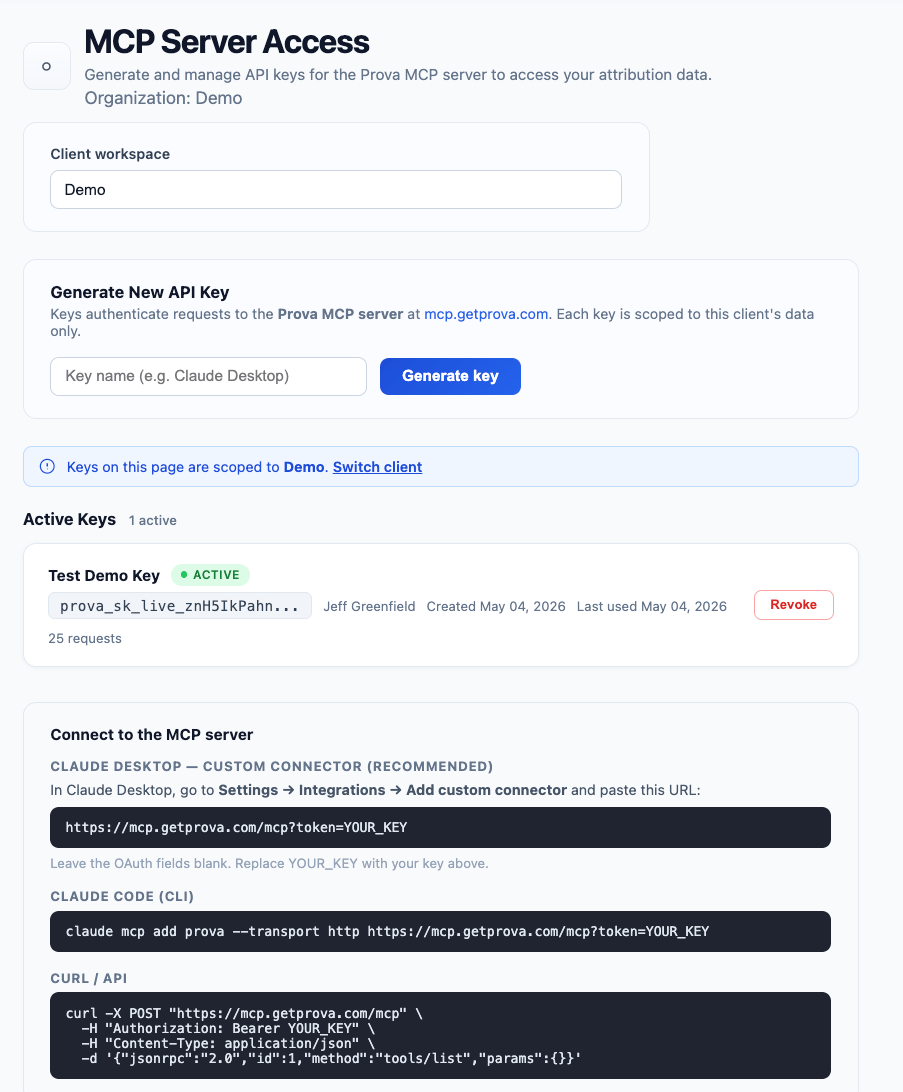
Step 1: Generate your Provalytics API key
In Provalytics:- Open
MCP Server Access - Confirm the correct client workspace is selected
- Create a key name such as
ChatGPT - Click
Generate key
Step 2: Enable custom connectors in ChatGPT
In ChatGPT, sign in as a workspace administrator. Then navigate to your workspace admin settings and confirm the features needed for custom connectors are enabled. Depending on your workspace, this may appear under areas such as:Workspace SettingsPermissions & RolesConnected DataApps
- developer mode
- custom MCP connectors
Step 3: Create a new MCP connector
In the ChatGPT workspace admin area:- Go to the section for
AppsorConnectors - Choose
Create App,Create Connector, or the equivalent option - Select
Custom MCP Connector
Step 4: Configure the Provalytics MCP server
Use the following Provalytics server details.MCP server URL
Authentication
Use the user-specific Provalytics API key you generated in Step 1. If ChatGPT asks for an authentication type, use the option that matches token-based authentication, such as:Bearer TokenAPI Token
- each user should use their own key
- keys should be treated as confidential credentials
- keys are read-only and client-scoped
HTTPS and supports modern TLS transport.
Step 5: Scan available tools
After saving the connector configuration:- Click
Scan Toolsor the equivalent action - Let ChatGPT connect to the MCP server
- Review the discovered tools before publishing
Step 6: Test the connector
Before publishing broadly, open ChatGPT and run a few simple test questions such as:- what are my top channels by incrementality this month?
- what does the latest recommendation suggest?
- how close did the latest model predictions match actual results?
- authentication is working
- the connector can access the correct workspace data
- the discovered tools are behaving as expected
Step 7: Publish the connector
Once validated:- Return to the ChatGPT
AppsorConnectorsarea - Publish the connector
- Set visibility for the right users, teams, or workspace groups
- specific users
- teams
- the full workspace
User authentication and permissions
Each user should authenticate with their own Provalytics key. The connector will operate using the permissions associated with that user’s credentials and the selected client workspace.Recommended operating model
Best practice is:- one key per user
- clear naming such as
ChatGPT - Jane Smith - revoke keys that are no longer needed
- test with a small group before wider publishing
What ChatGPT can help with
Once connected, ChatGPT can help your team:- answer live reporting questions faster
- summarize findings for internal or client meetings
- inspect recommendations and forecast outputs
- compare modeled performance across channels
- stay inside existing workflows instead of jumping between tools